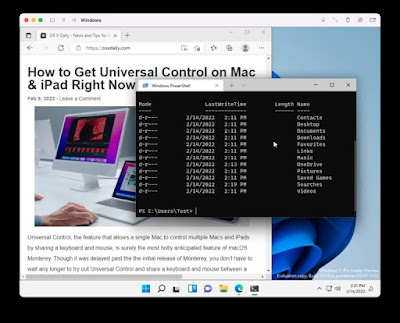
If you want to run Windows 11 on your M1 Mac, you can now do that, and
perhaps best of all, you can run Windows 11 in a virtual machine on the
M1 Mac entirely for free.
We’ll be covering how to install, setup, and run Windows 11 ARM on any Apple Silicon Mac, whether it has an M1, M1 Pro, M1 Max, M1 Ultra, or any other M chip does not matter, it will work just fine thanks to the UTM app.
Note this particular walkthrough is geared specifically for Apple
Silicon Macs. Intel Macs offer many other ways to run Windows 11 in
virtual machines like within VirtualBox, VMware, Parallels, etc,
step :
1. Download the UTM app for free, it’s a virtualizer and emulator application, and drag to the Applications folder to install it on the Mac
2. Download the Windows 11 VM for ARM free from Microsoft here (you will need a Windows Insider login for this, which is free to sign up for if you don’t have one already)
3. Open UTM on the Mac, then click the + plus button to create a new virtual machine
4. Choose “Virtualize” from the ‘I Want to” screen, then select Windows
5. Click the “Browse” button and select the Windows 11 VHDX ARM image you downloaded, with “Import Image” selected, then click Next
6. Choose the amount of RAM and CPU cores you want to designate to Windows
11 (recommend to give 8GB RAM or more for better performance), then
click Next again
7. At the Summary screen, choose “Save”
8. Now click the big Play button to boot the Windows 11 VM and begin setup
9. Walk through the Windows 11 setup process as usual, choosing your region, account name, etc – Note that networking and internet will not work yet, that takes an additional setup process which we’ll cover in a moment – thus choose that you have no network connectivity for now and let Windows 11 set itself up
10. Wait a few minutes and Windows 11 will launch running in the VM on the M1 Mac
11. To get internet access working in the Windows 11 VM, download the SPICE Guest Tools ISO here from the UTM website
12. In the active Windows 11 VM, click the disc icon in the toolbar and choose CD/DVD Iso > Change > and select the spice-guest-tools-xxx.iso file you just downloaded
13. Open the mounted D:\ drive in Windows Explorer, then run the SPICE Guest Tools installer in Windows, then restart the VM when installation is finished
14. The VM will reboot and Windows 11 will now be connected to the internet, confirm this by opening up the Edge browser and visiting a fantastic website
And there you have it, you’re running Windows 11 ARM on a Mac with an Apple Silicon processor.
Remember, you must install the SPICE guest tools to have internet access available in the Windows 11 virtual machine, and without it you will not be able to get the virtual machine online.
Windows 11 ARM runs pretty well on a Mac, though performance with UTM
may not be quite as good as some of the other virtualization tools
you’ve become accustomed to elsewhere. But as a free solution that is
simple to setup, this is more than workable and usable.
Red : OsxDaily


Post a Comment