BREAKING NEWS
Showing posts with label Gadget. Show all posts

2022/06/22

Step by step Install MacOS Ventura

 MacOS Ventura beta is available to install and run for Mac users who are interested in trying out the developer version of the upcoming Mac operating system.


Installing the Ventura beta is pretty easy, though it’s currently only available to registered Apple Developers. Other users will have to wait until the public beta is released next month, or for the final version in the fall.

Requirements for Installing MacOS Ventura Beta

You will need access to the macOS Ventura beta profile, which requires a developer account. Technically you can find the profiles online, but don’t do that, just wait for the public beta next month.

You will also need a Mac compatible with macOS Ventura, which is a much more strict list than prior MacOS versions. Any Mac from 2017 or later can run Ventura, whereas any Mac from before that can not. Specifically, any iMac from 2017 or newer, MacBook Pro from 2017 or newer, MacBook Air from 2018 or newer, MacBook from 2017 or newer, Mac Pro from 2019 or newer, or iMac Pro can run macOS Ventura.

It’s also not ideal to run beta system software on primary hardware, so preferably you have a test machine to try Ventura out on. And don’t forget that removing Ventura means you have to erase the entire Mac, you can’t simply reinstall Monterey.

How to Install macOS Ventura Beta on a Mac

Be sure to backup your Mac with Time Machine or otherwise before installing macOS Ventura beta. Failure to backup could result in permanent data loss.

     1. Visit the Apple Developer downloads site and login with your Apple ID, then choose MacOS 13 beta (Ventura)

    2. Choose to “Install Profile” to download the macOSDeveloperBetaAccessUtility.dmg file to your Mac

    3. Mount macOSDeveloperBetaAccessUtility.dmg and run the package installer, this installs the MacOS Ventura 13 beta profile onto the Mac

    4. Open System Preferences and go to “Software Update” to find the MacOS 13 Beta available to download and install


     5. Choose to “Upgrade Now” for macOS 13 beta *


     6. Let the macOS Ventura beta installer download, when finished it will reboot the Mac automatically directly into installing

    7. Proceed with the installation as usual, there are no onscreen prompts as Ventura just immediately installs

* Important Note: macOS Ventura beta immediately starts installation and reboots directly to installing over the current operating system, it is not like prior macOS versions where an installer application is downloaded into /Applications/ that you can manually quit.

** Important Note 2: You can also not remove or uninstall macOS Ventura easily, even by booting into Recovery Mode which will only offer the option to reinstall macOS 13. If you want to remove macOS Ventura beta from a Mac, you have to erase the entire hard disk and then use a USB installer drive for macOS Monterey to install that and start over again.

MacOS 13 Ventura beta will restart a few times to complete installation, and when done you will boot directly into Ventura. Again, there is no opportunity to select a different target disk to install Ventura onto, it just starts installing right away as soon as you click “Upgrade Now” from the Monterey system preferences.  


MacOS Ventura is obviously in early beta thus it’s not going to perform as well as expected, and you should anticipate bugs and crashing apps and unusual behavior. Also, many of the features will be refined as the beta period continues, so don’t be surprised if things change and shift as the versions continue to evolve towards the final release this fall. Hopefully things like the System Settings (replacing System Preferences) changes back to a more Mac like interface as well, since as of now it looks like someone copy/pasted the iOS Settings onto the Mac and looks very out of place and is not intuitive at all. There’s also something strange about the fonts display, maybe they system font is thinner, but whatever it is is causing me eye strain. Overall, I would not recommend installing the Ventura beta at this point, for anyone except true developers working on app compatibility.


Red: OsxDaily


2022/05/18

iPad Air 5, how to to Restart & Force Restart this Device

 Occasionally you may need to shut down, restart, or force restart a device, and iPad Air 5 is no exception.


 Whether it’s force restarting because of a frozen app, troubleshooting an issue, restarting for any number of reasons, or shutting down the iPad Air for a flight, we’ll cover how you can perform these common tasks for the iPad Air 5.

How to Force Restart iPad Air 5

You can forcibly restart an iPad Air 5 by initiating a series of button presses using the physical power and volume buttons on the device. Here’s the sequence to force restart:

    1. Press and release Volume Up

    2. Press and release Volume Down

    3. Press and hold the Power button until you see an  Apple logo on the screen

After you see the  Apple logo, the iPad Air will boot up as usual. Sometimes a forced restart can take a little longer than a regular restart.

This is a useful technique to know, because it turns out that the method of force restarting the iPad Air 5 is also used on any modern iPad that has Face ID and/or without Home button, including M1 iPad Pro, iPad Pro,, and iPad Mini. And, you use the same sequence to force restart any modern iPhone with Face ID as well.


How to Restart iPad Air 5

A graceful restart of iPad Air can be achieved by powering off and back on again:

    1. Press and hold the Power button and the Volume Up button until a “Slide to Power Off” shows on screen

    2. Swipe to turn off the iPad Air 5

    3. Wait a few moments, then hold down the Power button to turn the iPad Air 5 back on, effectively restarting the device

Basically turning the iPad Air 5 off, then turning it back on again, is how you restart the device.

How to Shut Down iPad Air 5

If you want to turn off iPad Air 5 completely, you can do that by shutting down the device:

    1. Press and hold the Power button and the Volume Up button until a “Slide to Power Off” shows on screen

    2. Slide to turn off the iPad Air 5

With the power off, the iPad Air 5 is turned off. This will allow the device battery to last quite a while as it’s going unused, and the device will not connect to any networks while powered off.

You can also shut down the iPad Air through Settings, but currently there is no restart option in Settings.

The new model iPad Air 5 is a nice upgrade to the iPad line, and many users coming to the new iPad Air may be upgrading from a device with a Home button, which offers a different method of shutting down, restarting, and force restarting. Thus it’s reasonable to expect some users are unfamiliar with the new procedure for restarting and force restarting the fifth gen iPad Air. Once you learn how and practice it a few times, it will become second nature.


Red : OsxDaily


2022/04/23

U-dessert is code name of Android 14's anyone could think of


Android 13 is very much still in development (as we wait not-so-patiently for Beta 1 to finally land) but even with its stable release still months off, pieces are already starting to fall into place for further-out Android versions. One question we've been kicking around for a while now concerns which dessert beginning with the letter U might be chosen as the development code name for Android 14 — and it's not like there are a ton of obvious U-names to choose from. Today we finally get our answer, with Android 14 set to go by the code name Upside Down Cake.

Google formally clarifies the code name in some recent notes added to the AOSP (spotted by 9to5Google). Honestly, that's the first U-dessert we thought of, mentioning it as a likely option back when confirmation arrived for Android 13's Tiramisu name. Even getting our U from “upside-down” feels like a bit of a cheat, but it's not like there were a ton of other obvious options. If we start going international with our dessert menu, that could start opening things up a little, but ultimately it's not at all surprising to see Google go in this direction.

Dessert names used to be a much more prominent part of new Android releases, and you'll still hear long-time users affectionately reference past versions like Lollipop or ICS. Even when we weren't talking about the dessert itself, it was still common to refer to its letter: Android M, or Android Q. But for the launch of Android 10 in 2019, Google took a step back from this association, instead embracing the numerical version as the preferred way to talk about Android.

That shift did make a whole lot of sense — it's clean, it's accessible, and really is just a lot more professional-sounding — but for those of us who long for the days when there was just a little more “fun” in Android development, at least the desserts live on as internal code names.

Android 15 is a long way off, but does anyone want to make any bets as to what our V-name might be? Vanilla-something could be obvious, or will Google take us in a new direction? Your guess is as good as ours.


Red:  Androidpolice

2022/04/21

Activate Feature Voice Isolation with FaceTime on Mac

 Voice Isolation mode allows FaceTime on the Mac to emphasize your voice while on FaceTime calls, thereby reducing background noises and sounds. This is a nice feature if you have some background noise going on that may drown out your voice when talking or make you otherwise difficult to hear, whether that’s a loud fan running in the background, a cat meowing, dog barking, a neighbors bad music blasting, or any such situation. You can use this on any FaceTime call, whether it’s video, audio, or group chat.

You’d be forgiven for failing to find any setting for voice isolation or background noise reduction while digging around in the FaceTime preferences, because that’s not where the capability resides. Instead, you use the Control Center, as we’ll demonstrate.

How to Reduce Background Noise in FaceTime on Mac with Voice Isolation

This feature is only available on the latest versions of macOS system software (12.0 or later), so if you haven’t updated yet you will need to do that before having access to the feature.

        1. Open FaceTime on the Mac if you haven’t done so already

        2. Now open Control Center on the Mac by clicking on the little switches icon in the menu bar

        3.  Click on “Mic Mode” to switch the microphone mode


        4. Choose “Voice Isolation” from the microphone mode options


        5. Return to FaceTime and make your FaceTime call as usual, whether video or audio

It’s a little curious that you have to go to Control Center to access the microphone mode to aim for background noise reduction in a FaceTime call, but that’s where the toggle is located. Perhaps in the future there will also be an easy option directly from the FaceTime call or app itself.

This is a feature that is available in macOS Monterey and newer, so if you’re on an earlier version of MacOS you won’t find the feature available.

This feature is really useful if you spend a lot of time making FaceTime calls, whether for personal or professional purposes. You’ll find it works pretty well.

While we’re covering the Mac here, you can also use background noise reduction with FaceTime calls on iPhone and iPad too using the same technology to isolate your voice and reduce background sounds.

Try it out, it works really well. 

You can further improve performance by using a microphone, AirPods, or even the wired EarBuds. In testing with a set of AirPods, I was able to run a vacuum cleaner while chatting on a call, and the person said they couldn’t hear the vacuum at all.

This feature is useful enough that it’s a little surprising it isn’t enabled by default for calls, since most people are making calls to hear a person chat, and not the background noise. Perhaps that will change down the road.


Red: OsxDaily


The way to Enable or Disable Macro Camera Controls on iPhone 13 Pro

 You can choose to have manual macro camera controls, or use the automatic macro mode setting, on the latest top-end model iPhones including iPhone 13 Pro and iPhone 13 Pro Max. This can help you to take macro photos easier, and more suitable to how you use your iPhone camera.

With manual macro camera controls enabled, when the macro camera is available you can tap a flower macro mode option to enable the iPhone macro camera.

With automatic macro camera mode enabled, the macro camera will activate itself when it is available by moving the iPhone camera lens close to an object or subject.

How to Toggle Macro Camera Control On or Off on iPhone Pro

Here’s how to customize the macro camera controls on iPhone:

        1. Open the “Settings” app then go to “Camera”

        2. Scroll down and locate “Macro Control” and toggle the switch ON to enable manual macro camera controls, or toggle the switch OFF to enable automatic macro mode on iPhone camera


How you prefer this setting to be is up to you and how you use iPhone camera macro mode.

If you prefer more manual controls, you’ll likely want to enable the Macro Control option, since you can choose when to use Macro Mode on the iPhone camera or not.

If you’d rather have the iPhone take care of things on its own, disabling Macro Control allows the iPhone to enter or exit macro mode on its own whenever using the iPhone camera.

This setting is only available on the latest high end iPhone models, including iPhone 13 Pro, iPhone 13 Pro Max, or better.


Red : OsxDaily


2017/02/10

Why Camera Freezing on iPhone 7 and iPhone 7+ ? How Fixing it?

Some iPhone 7 and iPhone 7 Plus users have discovered their wonderful camera freezes on open and randomly does not work.


When this happens it’s quite obvious; the user attempts to open the Camera either from the lock screen or the Camera app directly, and instead of having access to the camera, either a stuck blank black screen will show up on the camera display or a blurred image will show up on the camera display, and the iPhone is unable to take any picture or video.

Given that most iPhone users rely on it as their primary camera, and the emphasis Apple continuously places on using the iPhone as a camera for all of your photography needs, this is a pretty annoying bug.

While there is no great way to resolve this problem, there is a rather blunt-force solution to fix the stuck iPhone 7 camera issue.

Forcibly reboot the iPhone.

Yes, a forced restart is a decidedly low-tech solution but it works. Unfortunately simply quitting the camera app is not sufficient, you must reboot the iPhone 7 or iPhone 7 Plus to get the camera to function reliably again.
If you have not rebooted the iPhone 7 or iPhone 7 Plus yet, it’s slightly different from restarting prior iPhone models; rather than holding down the Home button you hold down the lower volume button, here is how you reboot the latest iPhone 7 and iPhone 7 Plus models, which will fix the frozen camera problem:

  • Hold down Power button and the volume down button until the  Apple logo appears on the iPhone 7 / iPhone 7 Plus screen
Once the iPhone boots up again as normal, access the camera and it will work as intended (for a while anyway, it may randomly freeze up again and require another restart down the road). This is more of a temporary workaround than a true fix since it can happen again, so perhaps a future iOS update will permanently fix the issue.

Here are two examples of what a frozen iPhone 7 / iPhone 7 Plus camera looks like, I personally encounter this issue a few times a week on a device updated to the latest iOS version:

iPhone 7 Plus camera frozen on all-black screen:


 iPhone 7 Plus camera frozen on a blurred image:


The iPhone 7 freezing camera issue a well documented problem on YouTube and throughout various discussion forums on Apple support site and elsewhere on the web (1, 2, 3, 4, etc). Oddly enough, release notes in iOS 10.1 noted a bug fix for a similar camera app issue, but the bug persists in the latest versions of iOS including iOS 10.2 and 10.2.1 for some iPhone 7 and iPhone 7 Plus users.


It’s likely the freezing camera issue will be fixed once and for all in a future iOS software update for iPhone 7 and iPhone 7 Plus users, since it is probably software related and not a hardware problem. As always, be sure to keep your iOS devices updated to the latest software versions to receive these bug fixes. You can update iOS system software on an iPhone in the Settings app > General > Software Update.

Since almost all iPhone 7 and iPhone 7 Plus owners likely have their devices under warranty, another option is to contact official Apple Support and let see if they can offer a more permanent solution. Some reports online indicate Apple has swapped out cameras or the entire devices if the issue persists for some users, so if you frequently encounter the problem you may want to go that route.

Have you experienced the frozen camera issue? Did this work for you? Do you have another solution to resolve the frozen camera problem on iPhone 7? Let us know in the comments.


source: http://osxdaily.com

2015/03/25

How using iCloud Password to Login & Unlock Mac OS X


Rather than remembering a separate password and set of login information for unlocking a Mac, OS X offers the option to use an iCloud password to login to the computer at boot, reboot, authentication, locked screens, and all login windows instead. This is a helpful feature for users who like to keep things simple and use a single login and password for all Apple related tasks on their Mac, since the Apple ID can access iCloud, the App Store, iTunes Store, Mac App Store, FileVault, and quite a bit more.

llowing an Apple ID and iCloud password to unlock a Mac and login to OS X is quite simple, and when setting up a new Mac or a clean install with OS X Yosemite you may opt to do so directly, otherwise it can be enabled at any time by toggling the feature on. For the average Mac user, this can be an incredibly useful feature, but while this undoubtedly has significant conveniences, using a single login and password for multiple events is not necessarily recommended in all environments, and many advanced users in high security situations will find this feature inappropriate for their usage.

Enable iCloud Password Login and Unlock Mac with OS X

Using an iCloud password for logging into and unlocking a Mac requires a modern version of OS X that has iCloud configured, and the Mac must have internet access to set this up:
  1. Go to the  Apple menu and choose “System Preferences” from the dropdown menu
  2. Choose the “Users & Groups” panel and select the primary Mac login from the left side, this is the account you will associate the Apple ID / iCloud password for unlocking and using 
  3. Click the “Change Password” button next to the users name
  4. At the prompt “Would you like to change the password for “User Name”, or begin using your iCloud password to log in and unlock this Mac? You will only need to remember one password if you use your iCloud password to log in to this Mac.” – choose “Use iCloud Password…” 
  5. Enter the old password, then login with the iCloud account (your Apple ID) and the associated password, choosing “Use iCloud Password” to set this as the login for the Mac
  6. Close out of System Preferences when finished
The next time you’re at a login screen, either after system reboot, on network logins, at Fast User Switching login, a locked Mac screen, authenticating the root user, authenticating for administrative purposes, or just about any other imaginable situation where you’d be unlocking a Mac with a login screen in OS X, you’ll now use the Apple ID and iCloud password to login to the Mac.

Effectively, your Apple ID becomes your user name and the iCloud password becomes your login password. Once this is configured, you” use that iCloud Password to login & unlock Mac OS X.

 While this does reduce the total number of logins and passwords necessary to remember, one potential issue with using the iCloud password for unlocking the Mac is that if you happen if you course if you lost your Apple ID password and login details, you’d need to recover it before being able to login to the Mac, as the Apple ID would no longer be able to function as a backup password in a forgotten password situation, which is something you can do when you have a separate password configured for logging into OS X and for the general Apple ID and iCloud experience.

If you decide you don’t want to use the iCloud password for your own unlocking and logging in purposes, you can still set it as a valid network login option for not only your own user account, but for other iCloud users with an Apple ID as well.

red:Osxdaily 

2015/03/24

Released, iOS 8.3 Beta 4 to Developer and Public Beta to Users

Apple has released the fourth beta release of iOS 8.3 to those registered with the iOS developer program, or who are participating in the iOS Public Beta. The build is versioned as 12F5061 and is available now for compatible iPhone, iPad, and iPod touch devices.

The simplest way to install iOS 8.3 beta 4 is through the Over-the-Air software update mechanism on the iOS device. This is accessible through Settings > General > Software Update. As always, back up the device before updating system software, this is particularly important when that iOS software is a beta version. Additionally, it is not advised to run beta software on a primary device.


The new beta build IPSW can also be downloaded from the iOS Dev Center for those registered with Apple.

iOS 8.3 continues to focus on improvements, bug fixes, and feature enhancements, and the version is expected to include new diverse Emoji icons, wireless CarPlay connectivity, Apple Pay improvements, new languages for Siri, and Google 2-factor authentication support.

While this is the fourth beta of iOS 8.3 overall, this is the second release available to Public Beta users of iOS. There is no known timeline for iOS 8.3 being released to the general public, but one could reasonably expect a final version to arrive before Apple Watch debuts.

Separately, Apple has also made Xcode 6.3 beta 4 available to iOS developers.

red:Osxdaily 

2013/12/26

AOKP KitKat nightlies now available


Earlier today we reported on Paranoid Android’s first release of its AOSPA4+ ROM, but that’s not the only custom ROM bringing out some Android KitKat goodness over the holiday week.

On Christmas day AOKP released its first nightly builds of Android 4.4.2 for all newer Nexus devices, the Galaxy Nexus and quite a few popular handsets including the Galaxy S4, GS3, HTC One and Xperia T and V.

Not all of the officially supported AOKP devices have seen the release of nightlies yet, but at least the biggest hitters are covered and we imagine more devices will be added in the weeks to come.

Keep in mind that nightly builds aren’t for everyone. If you are looking for a completely stable Android experience with no need for additional troubleshooting, you probably should wait for a more stable release. It’s also important to note that installing the AOKP nightly ROM will require a full data wipe.

To download the ROM for yourself or for installation instructions, be sure to head on over the AOKP blog.

red:Androidauthority

2013/12/25

Oppo Find 7 with a resolution of 1440×2560


Just like we saw with the Oppo N1, Oppo has begun the process of slowly releasing new information about its upcoming Find 7 handset via a series of teasers meant to bring both attention and improved international brand recognition to the still relatively unknown manufacturer.

In an earlier teaser, Oppo revealed the Find 7 would be one of the world’s first handsets with a 1440×2560 (aka 2k) resolution. Now the company has unveiled the device’s screen size: it will be 5.5-inches with a ppi of 538.

The teaser also says the handset will be a 5.5-inch handset with the “feel” of a device with a 5-inch display, which may indicate that Oppo is following LG’s example with the G2 and moving things around so they can put a bigger display in less space — though keep in mind that’s just speculation on our part.

Aside from the screen size and resolution, we know very little else about the handset. Turning to the rumor mill however, the Find 7 could reportedly feature a 2.5GHz Qualcomm Snapdragon 805 CPU, 3GB RAM, a 13MP shooter, an Adreno 450 GPU and a 4000 mAh battery. Of course these specs have yet to be confirmed, so take them with a grain of salt.

As for when we’ll see the Oppo Find 7 officially announced, that’s harder to say. More than likely though, Oppo will continue the teasing for at least a few more weeks, and will take the wraps off the FInd 7 completely sometime in early-2014.

With $599, Oppo N1 CyanogenMod Edition ready to market

As expected the Cyanogenmod-powered Oppo N1 has arrived, available for the same $599 price tag as the standard N1, but featuring custom packaging, a CyanogenMod phone case, the O-Click remote shutter, some Cyanogenmod stickers and – of course – CyanogenMod 10.2! If that’s not enough for you, the shipping is also included for free.


Aside from the unique packaging and default installation of CM10.2, there’s not much difference between the standard N1 and the CM Edition. Spec-wise we are still looking at a 5.9-inch 1080p display, a Snapdragon 600 CPU and 2GB of RAM. Other specs include 16GB storage, rear touch panel, a rotating 13MP camera and a 3600mAh battery.

As an extra bonus for those that like to tinker, CyanogenMod Inc has also released the source code and factory images for the Oppo N1 CM Edition.

So should you pick up the CM Edition or the regular version of the handset? Honestly, it really depends on what type of experience you’re looking for out of the box.

If you’re a fan of Cyanogenmod and looking for a pre-installed experience with a few extras, you can’t go wrong here. Then again, if you’re more of the DIY-type, you could always snag the standard Oppo N1 and flash the upcoming official Oppo N1 CyanogenMod ROM.

red:Androidauthority

5.25-inch Galaxy S5 with 2560 x 1440 AMOLED display rumor

A new report from South Korea says that Samsung has started mass-producing 5.25-inch displays for the upcoming Galaxy S5 flagship smartphone.


DDaily says that the Galaxy S5 will have a 5.25-inch AMOLED display that will pack an impressive WQHD resolution, or 2560 x 1440, for a pixel per inch density of 560 – a previous rumor also saidhinted that Samsung’s next-gen smartphone will have a 2560 x 1440 display. According to the publication, the Galaxy S5 display will be similar to the Galaxy S4 and Galaxy Note 3 when it comes to pixel arrangement, as Samsung will keep in place the diamond pixel arrangement seen in its 2013 flagship handsets.

However, Samsung is yet to confirm Galaxy S5 development plans, and while this WQHD mass-production report is based on interviews with unnamed industry sources from South Korea, we’ll remind you that this is still just a rumor. In case you’re shopping for devices with 2560 x 1440 resolution, you can always check out the Vivo XPlay 3S.

As we approach the busy CES 2014 and MWC 2014, we’ll remind you that various reports have claimed that Samsung will unveil and launch the Galaxy S5 early next year – or at least earlier than initially anticipated – as the company may be in a hurry to make up for the lower than anticipated Galaxy S4 sales with a new high-end device. However, these reports are also yet to be confirmed.

Samsung’s competitors are similarly rumored to be working on new flagship devices including HTC, Sony and LG.

red:Androidauthority

Review and Spec of Samsung Galaxy Round


The Samsung Galaxy Round launched on October 10 as the first smartphone with a curved display, a title that Samsung narrowly snagged from bitter local rival LG.

It’s safe to say that the Round was not what most of us expected from flexible display technology, after Samsung teased it for years as a game changing feature. That’s because the Round is more of a proof of concept than a real attempt to make curved smartphones a mass-market success. It’s a first milestone on a road that we’ll eventually take us to new form factors, that are, for now, on a distant horizon.

But even if the Round is not the game-changer we’ve been hoping for, it’s still a really interesting device. It comes with top of the line specs and all of Samsung’s software features, but also with a price tag to match. Should you buy it, provided you can get your hands on one? Is the Round worth the investment, curved screen aside? Join us as we find out in our Samsung Galaxy Round review.

Design and build quality

While the Round lacks the S Pen that would make it a member of the Note family, it’s still obviously inspired by the Galaxy Note 3, which is visible in its size and design. The device is as tall and wide as the Note 3, and just a little thinner, though you probably won’t feel the 0.4 millimeters difference. What you may notice is that the Round is 14 grams lighter than the Note 3, possibly thanks to the plastic substrate of the display, which is lighter than Note’s conventional glass.

You get the classic Samsung layout on the Galaxy Round: a physical home button flanked by capacitive menu and back keys on the front, the power button on the right, and the volume rocker on the left. The removable back plate is made of the textured plastic that Samsung introduced on the Note 3, which gives it great grip and a nice feel in hand. While the faux stitching is probably an unnecessary embellishment, we like the leathery texture of the Round, and it’s definitely a welcome step away from the glossy plastic that marked Samsung’s high-end devices in the past couple of years.


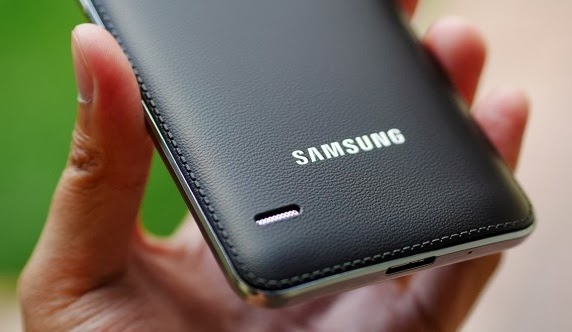
The soft, comfortable texture of the faux leather is enhanced by the device’s signature curved profile. The phone just feels nice in hand following the contour of your palm, even if it’s such a large device. The sides of the phone are slightly thinner than the center, and much of the weight of the Round is concentrated in its middle. That makes it self-balancing, which is important for the tilt-actioned software features that Samsung equipped the phone with.


Overall, the curvature of the Galaxy Round doesn’t change the user experience in a significant way. This feels like a “normal” phone, more so than the rival LG G Flex, which is curved from top to bottom. Especially if you know the Note 3, you will feel right at home on the Round.


Display
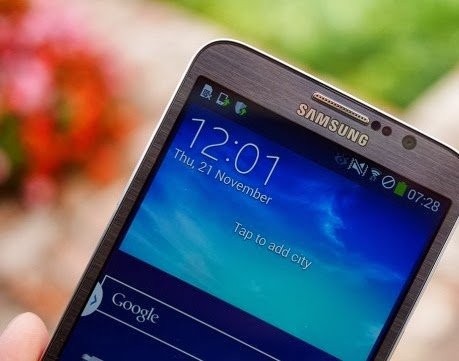
Samsung managed to equip the Galaxy Round with a Full HD display, which is notable because the LG G Flex comes with a 720p screen, even if it’s larger. The 5.7-inch AMOLED panel on the Round is as good as anything that Samsung has put on the market so far – we noticed no differences between the glass-based Note 3 and the plastic-based Round, which is a major achievement for Samsung.


Being so subtle, the curvature of the display doesn’t distort images in any way, and, once you turn the phone on, you will quickly forget that the screen is curved. Look at it directly, and the Round looks exactly like any regular flat design. The only time you might notice a difference is when you see reflections on the screen, which are distorted and made smaller by the concave sheet of glass.


Watching movies and playing games is a pleasure on this beautiful 386 ppi screen. Like any modern AMOLED device, the Round is bright, has beautiful colors, and deep blacks. If you are put off by the oversaturate colors, you can set the phone to a more realistic color profile from the phone’s settings.


In terms of usability, the curved display does make it somehow easier to reach the screen with your thumb, but do keep in mind that this is a large phone that’s designed primarily for two-hand use.

Performance and hardware

We have to give Samsung credit for not making any compromises when it comes to the Galaxy Round’s specifications. At the core of the phone, there’s a powerful Snapdragon 800 system on a chip from Qualcomm, comprising of four Krait 400 CPU cores clocked at 2.3GHz and an Adreno 330 GPU. The Round is one of the select few devices to feature 3GB of RAM, along with Samsung’s Note 3 and the Note 10.1 (2014).


This combination of hardware makes the phone fly through the user interface, though we feel it would be even faster with a simpler OS instead of TouchWiz. That extra RAM comes in handy when using Samsung’s signature MultiWindow multitasking mode, as well as when loading games and large media files.

There’s 32GB of storage by default, and you can extend that with the microSD card slot found underneath the removable back plate. You also get the bells and whistles that Samsung launched on the S4 and carried over on the Note 3, including air gestures, an IR blaster, and sensors for temperature and atmospheric pressure. You might not need all of these features, but you’ll appreciate having at least some of them. All things considered, the lack of the S Pen is the only difference between the Round and the Note 3.

We had no qualms over the call quality and the phone’s speakers are adequately loud, though fidelity goes down as you pump up the volume.

The battery inside the Round is elongated, to accommodate the phone’s curvature, but it’s still a conventional removable unit. At 2,800 mAh, it’s smaller than the Note 3, but we think most users won’t be affected by it. On average, the Round should be good for two days of light usage, and, even if you are a heavy user, your phone will not shut down before the end of your workday. Even better, the unit we reviewed came with an extra battery and a special charger for it.


Camera

The Galaxy Round comes with the same camera module that Samsung uses on the Galaxy S4 and the Note 3. In other words, it’s a competent, high-quality camera loaded with software features, but lacking optical image stabilization or other special technologies.
The app is fast and the shutter is responsive, which is good for the moments when you whip out your smartphone in a hurry to capture a passing moment. If you’re willing to spend a little more time navigating the settings and various camera modes, you get a wealth of features that you can use creatively, such as dual shot, shot and sound, burst mode, drama mode, and erase mode.

Even if you’re not into Samsung’s little software features, the Round still provides a great camera experience. Images are crisp and color reproduction is excellent in most cases, though you might encounter problems in lower light or with fast moving subjects.


Software

Just like with hardware, in terms of software the Galaxy Round is a consummate Samsung flagship. TouchWiz may be getting long in the tooth for some, but no one can deny that’s a feature rich implementation of Android. Samsung’s unique additions include touchless controls and the Premium Suite, including a nice multiwindow multitasking feature that takes advantage of that expansive screen. Just like with the hardware, you might not need all the stuff that Samsung threw in there, but you may find some feature or another very useful; even if you don’t, you can blissfully ignore everything that is non-essential.


The Round comes with a couple of unique software features that take advantage of its curved shape. When placed on a flat surface, you can tilt the device to a side to see any notifications or to skip tracks when you are listening to music. It’s a neat little trick, but in most cases, it’s simpler and faster to use air controls for the same task. We covered the tilt features of the Galaxy Round in more detail here.


Pricing and final thoughts
The Galaxy Round is a very limited release, and Samsung has expressed no intention to make it available outside South Korea. You can get it unlocked from specialized retailers though, if you’re willing to pay a premium for the privilege of owning such a rare piece of kit.
As with the LG G Flex, it’s definitely not worth buying the Galaxy Round for its shape alone, because the curved screen doesn’t really change the way you use the phone. Yes, it has a nice wow factor, but that tends to wear off after a while, or even turn into an annoyance. However, even if you ignore the curve, the Round is a great phone – you get high-end hardware, a beautiful screen, long battery life, and an excellent camera, just to name its biggest qualities.

Watch the video:


red:Androidauthority

HP launch new Smartphones before the end of 2013


HP is reportedly working on some new smartphones for the end of this year, though they might not be the phones we’d hope for.

According to The Information HP is working on some low-end Android phones for emerging markets like China, India, and the Philippines by the end of this year. The phones will probably be 6-inch and 7-inch devices that will cost about $200 to $250 without a contract. At those prices in those markets, the new HP phones would be strictly low-end, though it’s hard to imagine them being as great as the low-end Moto G.

Rumors about HP making smartphones aren’t exactly new. Neither is the idea of the company making Android devices. HP released the Slate 7 Android tablet earlier this year, which is also a relatively cheap device. More Android tablets are on the way, though HP has never publicly made any announcement about smartphones, only talking about them as “long term” prospects.

The current rumors don’t give HP much time to announce the new smartphones. There’s only eight days left of 2013 in which to announce the devices if the rumor is true. If HP doesn’t announce the phones within the next week, however, there is always a chance for a 2014 announcement of the phones. Even if an announcement is made in the next few days, a 2014 shipping date would seem likely.

The last smartphone HP ever released was the HP Veer back in 2011. That phone was the last WebOS smartphone released, though the company also had the Pre 3 ready to go and was working on an all-touchscreen WebOS device. It’s not clear if any of the former Palm design team is left at HP, or if they worked on these rumored devices. It’s nice to dream about a Palm Pre-inspired Android phone, however unlikely it may seem.

red:Androidauthority

2013/02/01

Android apps of the week


This week, we feature apps that won’t only keep your hands on your phone but also help you discover new places to explore whether alone or with your friends. Because hey, A stands for “adventure,” and Android never skimps on giving you the grand adventure that you need.

Can’t wait to see what’s under the cloche? Get the dining ware ready because here 7 new Android apps, dressed and ready for your consumption.

Epic Citadel

 
Travel the magnificent virtual citadel, created by Epic Games, called the Epic Citadel. Looking at the app’s Google Play Store page, I really thought that this was a game. But, after using it, I found out that this was an interactive benchmark tool that measures your GPU’s performance. Powered by Unreal Technology, the state-of-art designs of the citadel look amazing. Its graphics actually remind me of Assassin’s Creed 2. Aside from using the app as a tool, you can also walk around and explore the breathtaking citadel.


50,000+ downloads
1780 ratings (4.6 avg)

Wotchapp

 
The weekend is approaching. Have you already chosen a place where you and your friends can hang out? I did and it was easy with CoreDigital’s Wotchapp app. This app scans your location and suggest popular places where you can hang out. Locations are grouped into three: Arts & Entertainment, Food, and Nightlife Spot. Nearby places will then be displayed on the screen. You can also read user reviews, comments, and even photos submitted by users to a hangout place. The ads-supported Wotchapp app can be downloaded for free. Ads will only appear at the bottom of the screen.

500+ downloads
31 ratings (4.5 avg)

RetroArch Android


Sit back, relax, and enjoy early 90′s gaming with RetroArch Android, a free game emulator app by Libretro. Unlike most game emulator apps, RetroArch allows you to play several game platforms on your smartphone. RetroArch currently comes with 14 game emulators such as FCEUmm for Nintendo NES games, Snes9x-Next for Nintendo SNES games, and — my personal favorite — Nestopia for the Nintendo NES where I can play the classic Casltevania game. The app is simple, straightforward, and easy to use. It’s like carrying a portable gamebuddy everywhere you go.

10,000+ downloads
385 ratings (4.4 avg)

LINE Brush


Art has always been my first love. Even when the latest technology offers state-of-the-art drawing tablets and digital art programs, I still end up going back to my traditional tools in painting. But, I discovered a nice alternative to my traditional approach: LINE Brush. NAVER has created a no-frills drawing platform that is not too heavy on any device. The interface is very responsive and easy to navigate around. I especially like the brush sets in the app, even if they’re currently limited. At the same time, you can draw on pictures or transform pictures into paintings using Photo Brushes. Best of all, you can be as artistic as you want to be without having to bring so much with you. I tried this on an Xperia TX, and painting on the Xperia TX has never been this fun!

100,000+ downloads
1046 ratings (4.4 avg)

iSense Music – 3D Music Player


SmoothApps’ iSense Music – 3D Music Player may look simple but this music player is quite feature rich and intuitive to use. You can browse your music collection by sorting through album art on a carousel and easily add songs to your playlist. If you need to do more, access the menu by swiping up from the bottom. You can tweak the equalizer by using presets or reverb, or you can customize your listening experience yourself. If you want the app to be even more attractive, you can change to any of the three free themes that come pre-installed or download more from the Google Play Store. You can purchase iSense Music – 3D Music Player from the Google Play Store for US$2.00.


TinyTunes


Whether you like your steak served well-done, medium well, or medium rare, we prefer serving the freshest Android apps hot and sizzling. Here at Android Authority, we believe that getting the hottest new apps is the best way to start the weekend.
This week, we feature apps that won’t only keep your hands on your phone but also help you discover new places to explore whether alone or with your friends. Because hey, A stands for “adventure,” and Android never skimps on giving you the grand adventure that you need.
Can’t wait to see what’s under the cloche? Get the dining ware ready because here 7 new Android apps, dressed and ready for your consumption.


1,000+ downloads
18 ratings (4.3 avg)


Scoopt


Do you ever have one of those days when you want to go out but have no idea where to go? Feel like exploring your city but don’t want to waste your time with terrible establishments? Designed and developed the company of the same name, Scoopt lets you explore great places around you through friends’ recommendations. The best part is that you don’t need to go through lengthy articles; instead, Scoopt works together with Instagram so that pictures are presented in a clean and gorgeous magazine format. If you don’t have a lot of friends on Scoopt, however, you can check out what other Scoopt users are saying about the places they’ve been to according to location or category, such as Eat, Drink, Shop, and more.

100+ downloads
6 ratings (5 avg)


Copyright © 2014 Deepersolids. Designed by OddThemes